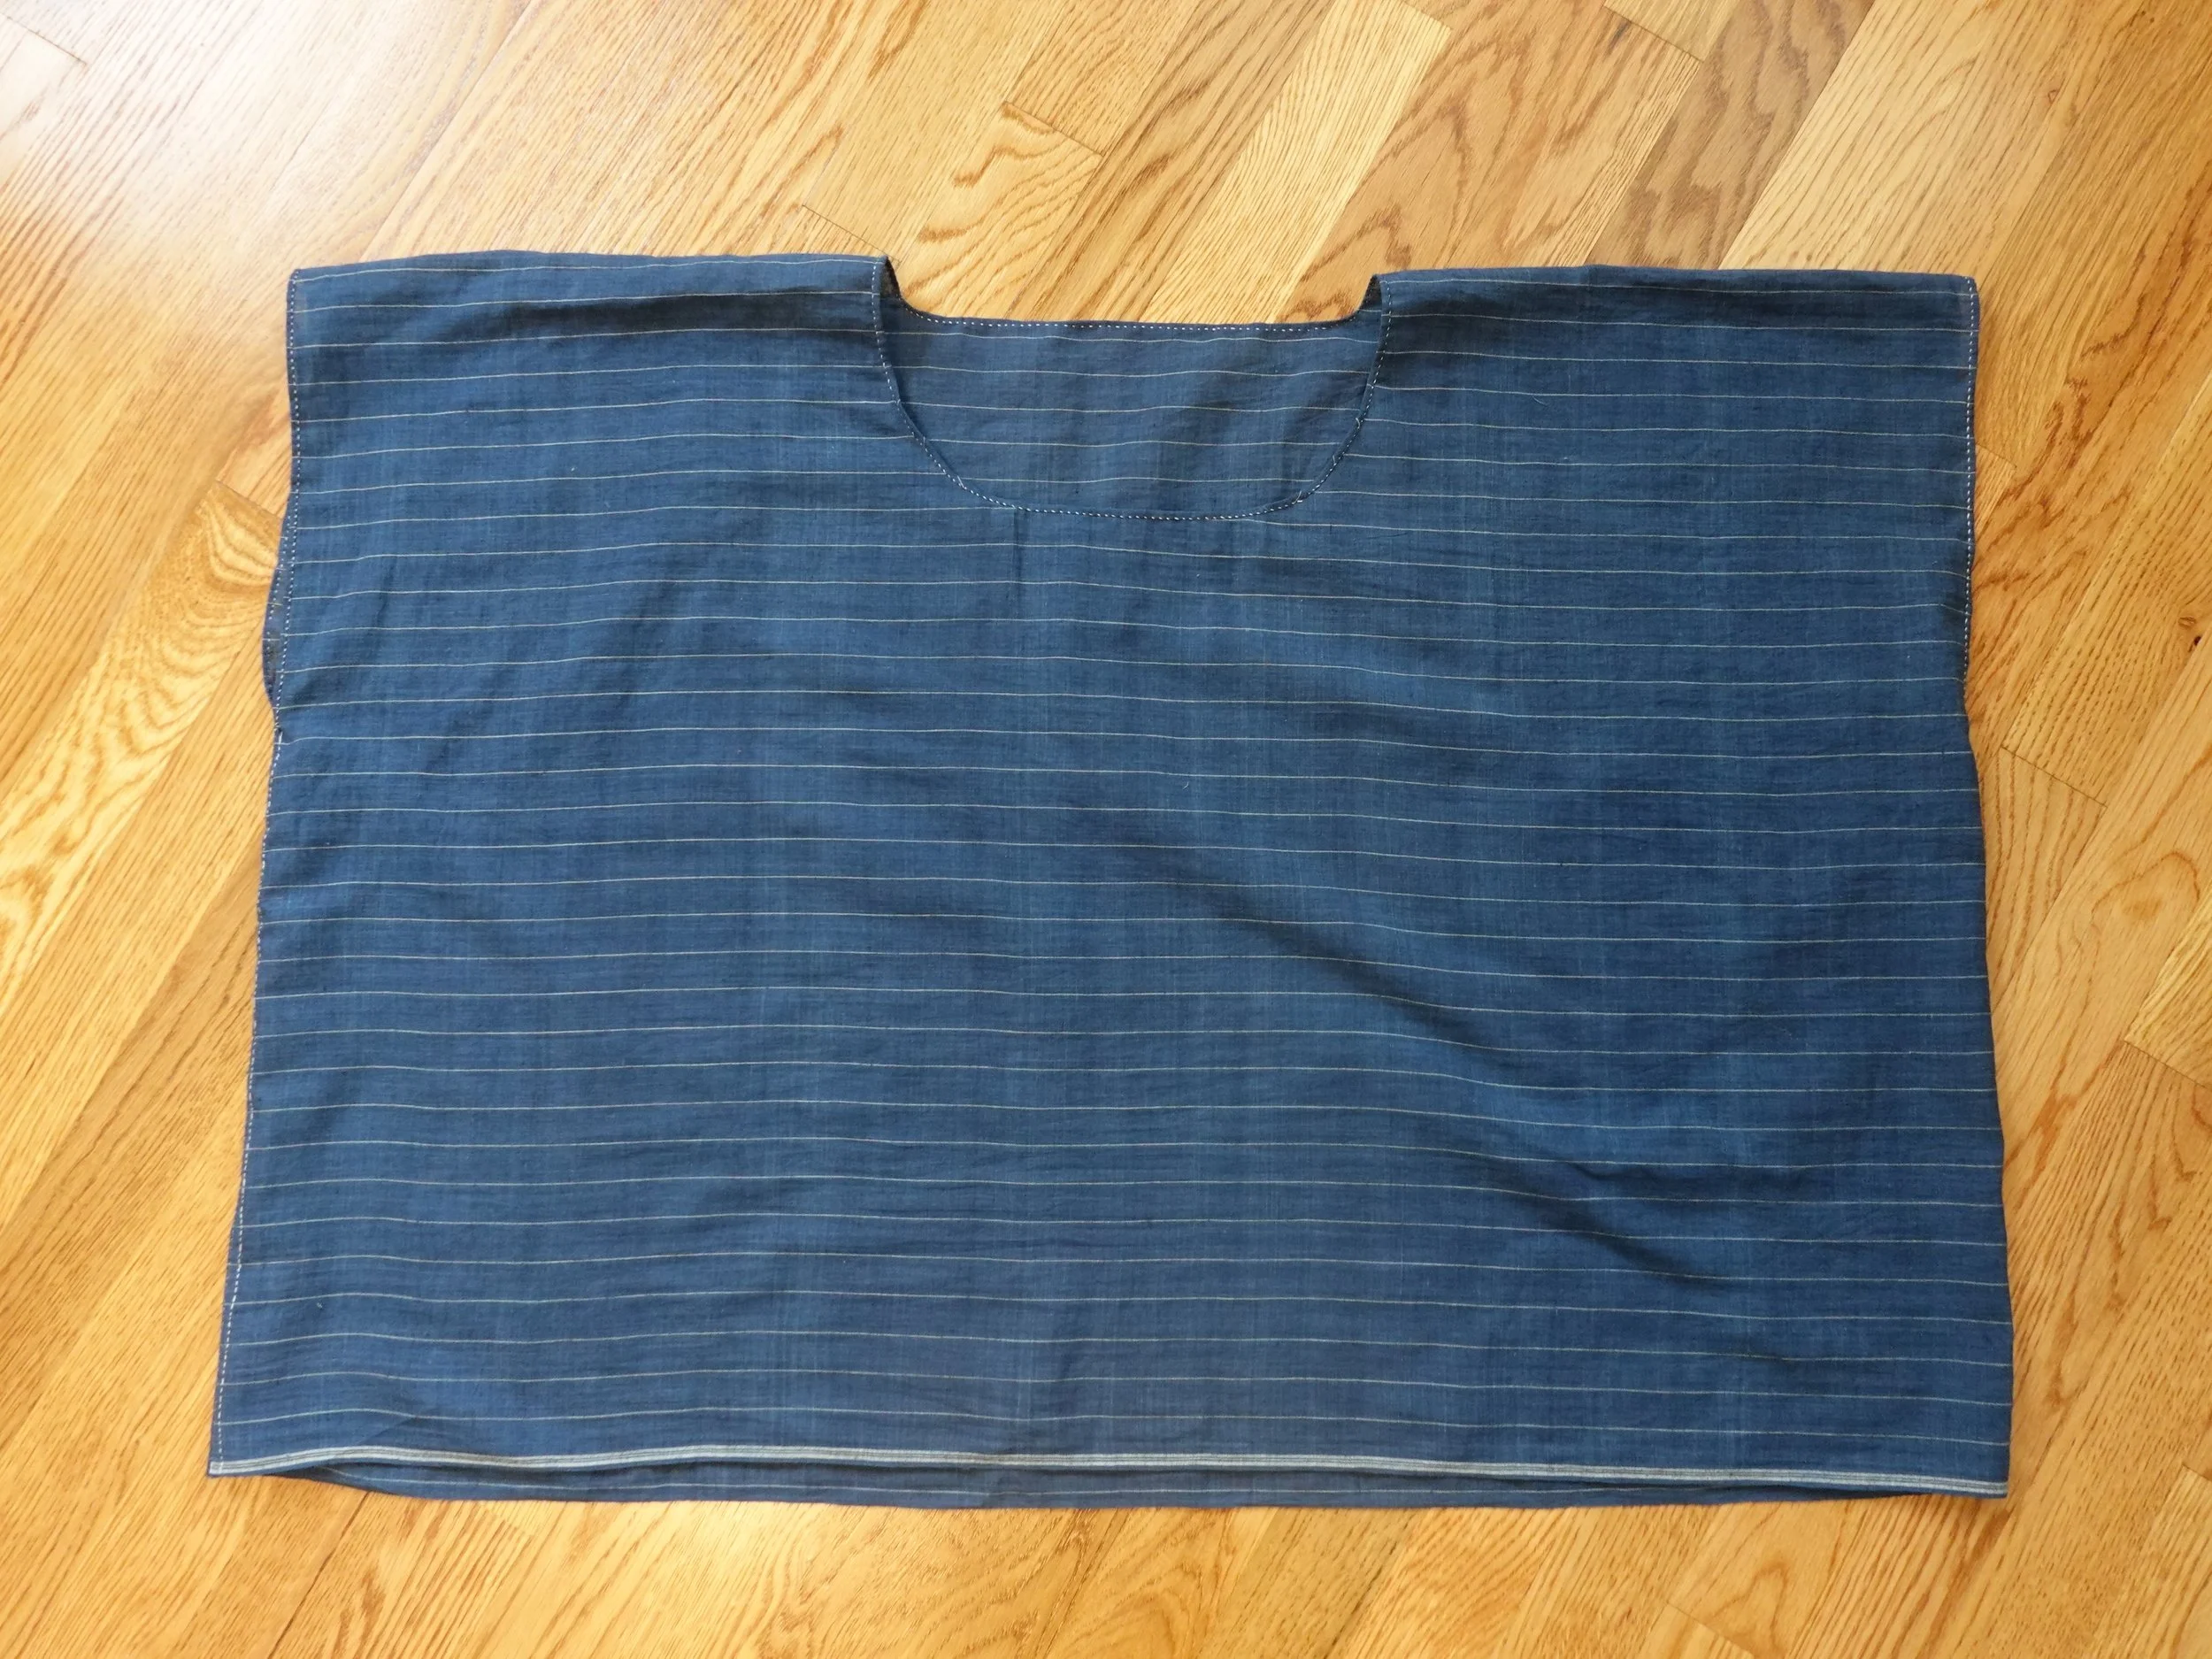
Welcome to the Pre-recorded “Hand-Sewn Tunic” Class!

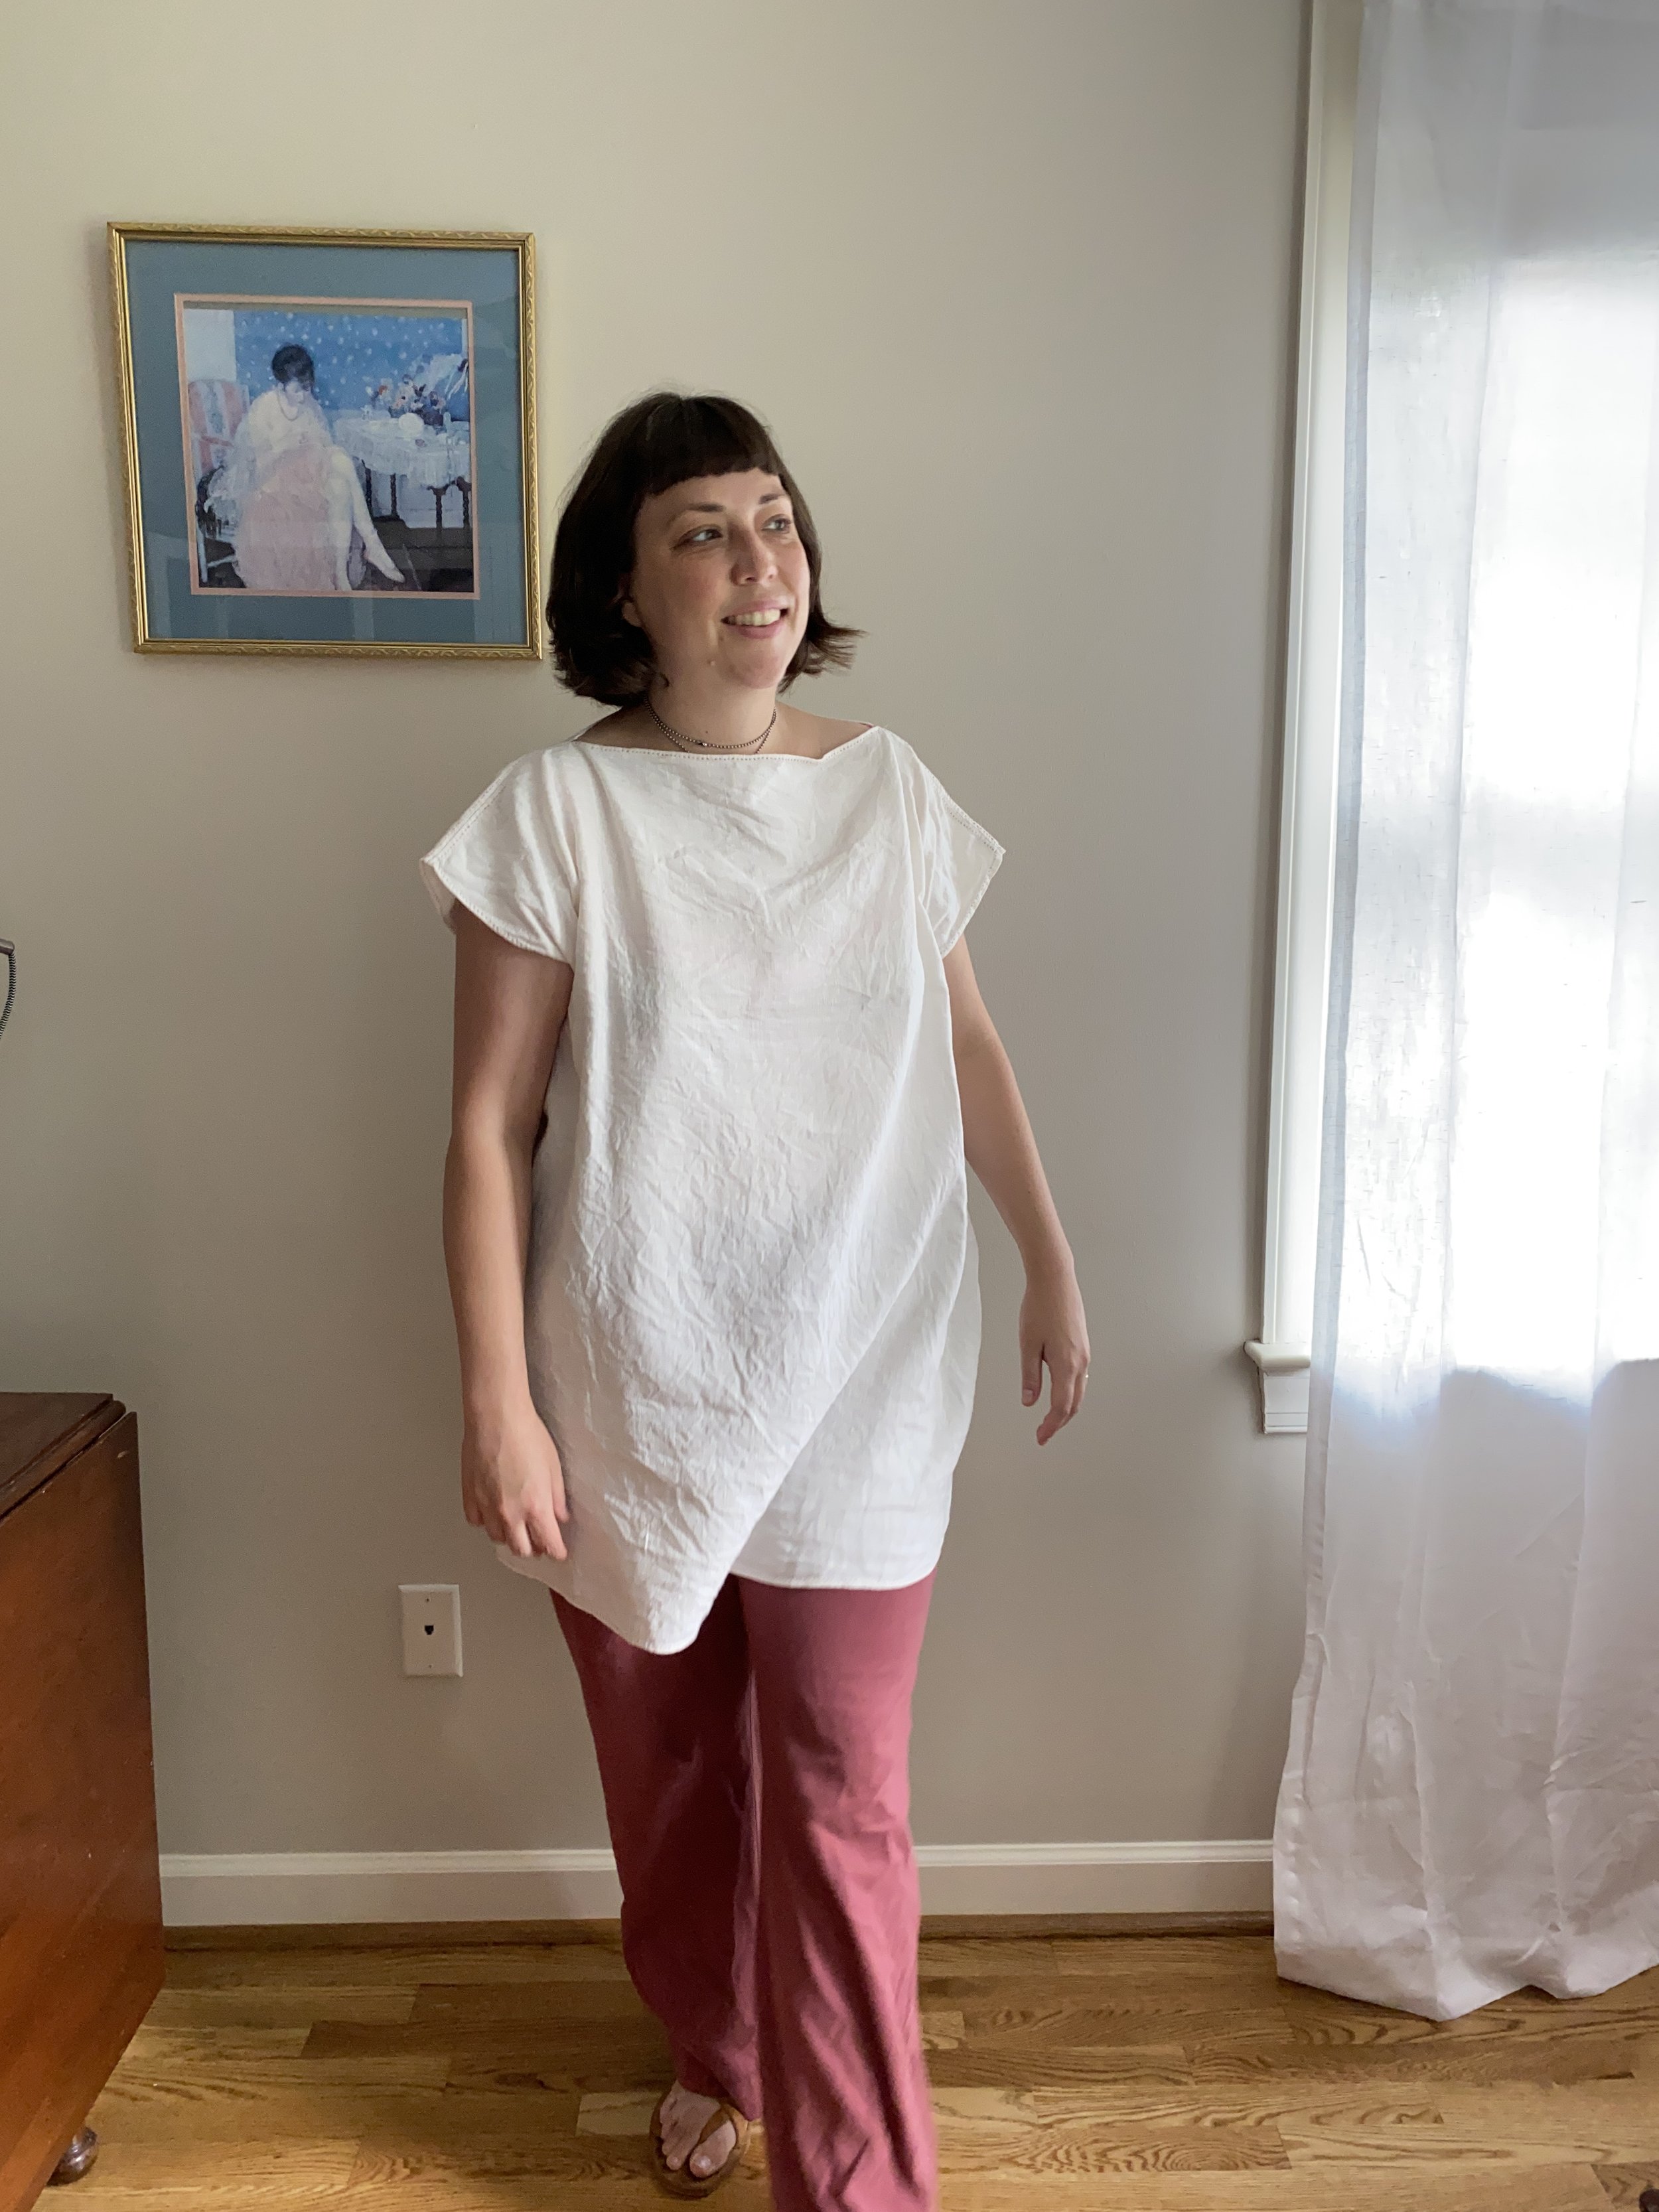
In this pre-recorded class you will make a basic hand-sewn tunic. This simple design is perfect for hand sewing and embracing minimal textile waste. Your tunic will be either a rectangle or a square depending on the design you choose. The goal is to make a tunic you love while also minimizing waste when cutting out the fabric. This class is not intended for you to make only one style. Some of these styles are one piece with a fold at the shoulder and others are two piece and seamed at the shoulder. The goal of the class is to teach you basic designs to empower you to get creative and sew a variety of designs using the theories taught in this class. You will get comfortable with understanding the width and length of your fabric to create a beautiful top. I will be making a blue cotton tunic to teach you these principles. I have also provided two other examples I have sewn as other options to inspire you. One is shorter and one is longer. Once I made one, I couldn’t stop! They are so easy and fun to make! 

Workshop format: This workshop is organized in a series of sections with a pre-recorded, close-captioned video as the key manner of instruction. You are strongly encouraged to watch the video before you start sewing. This class is designed for you to go at your own pace using the pre-recorded videos for instruction. Pause, rewatch and review. The goal of this class is to empower you with an understanding of basic garment cutting and construction to create a simple long or short tunic.

To learn more about your teacher, Sarah Woodyard click here.

 Designing Your Tunic

The body of a shirt is a long rectangle.

This tunic will be a square or rectangular. My inspiration to make these tunics came from years of studying and making 18th-century linen garments such as shirts and shifts. These garments are made from geometry and the shirt body is just one big rectangle. The construction methods I teach are taken from how these garments were sewn together using small hems and narrow flat-felled seams.

The width and length of the finished tunic will be determined by 1) your measurements 2) the style you want 3) the amount of fabric you have. I would recommend drawing out your design first with measurements on the template I have provided. 

Ask yourself:

  • How long do you want it? waist? high hip? mid-hip? mid-thigh?

  • How wide is my fabric? How much yardage do I have?

  • What neck-line do you want? V-neck? Rounded neck? Boat neck?

  • How full do you want it?

  • How far off your shoulders do you want the shoulders to hit?

  • Do you want the grain line to go around the body or up and down the body?

Here are three examples of styles you can make. (PS. there are way more but these are three I have made and can share with you.) Read in the caption of each example to learn more about the design details and watch the video below. Grab a paper and pencil and sketch out your ideas and measurements.

     For the blue striped cotton tunic I let the yardage dictate the design versus my measurements. I had 1 yard and played around with folding it so that the straight of grain went down the body and the grain line going around the body. I decided to have the selvedge run around the hemline and have the grain go across the body. This meant the body would be full and the hem would hit at hip level.  I decided to cut off 4” (10 cm) of width to use for ties if I wanted them later on. To minimize waist I embraced the drop shoulder and the fullness of the body. The shoulder is on the fold with two sides seams. The cut dimensions of the body when laid flat are 32” (80 cm) wide by 23” (57.5 cm) long. I was inspired by the neckline of shifts for the neckline. The neck line was cut down 5.5” (13.75 cm) on the front neck and .5” (1.25 cm) for the back neck. The opening was cut at 8.5” (21.25 cm). The arm openings are 9” (22.5 cm) deep.  

This white linen tunic was designed with the width of the fabric in mind. The fabric from selvedge to selvedge is 56” wide (140 cm). The tunic is cut with one side seam and a fold where a side seam would be. The shoulders are seamed together over the shoulder. Taking into consideration the widest part of my body is 47” (117.5 cm) this gave me 11” (27.5 cm) of ease and meant the finished width would be 27.5” (82.5 cm) when laid flat. Thinking of the finished width was important because that dictated how far off the shoulder the fabric would hit or how much of a drop sleeve I would have. Since my shoulders from outer shoulder to outer shoulder measure 17” (42.5 cm) that gave about a 5 inch (12.5 cm) sleeve. I only had 1 yard of the material and realized I could incorporate the selvedges into the design to maximize the width. Even though I had 36” (90cm) in length I cut the length of the body at 30” (76” cm) because that was how long I wanted it to be. The width of the body is 27.5” (82.5 cm). The arm openings are 8.5” (21.5 cm) deep.

This pink and white striped top was designed based on the amount of fabric I had left over from a project. It turned out I had enough for it to be a closer fitting top. This, in turn, dictated the length of the top. Because it is closely fitted the width of the tunic would not go over my hips and therefore ended up ending at my upper hip. The width of the body when laid flat is 22” (55cm) and the length is 18.5” (46.25 cm). I chose a v-neck because I think that is flattering for my face. The neck dimension is 8.5” (21.25 cm) wide with the front neck opening is cut 6” (15 cm) deep and the back neck opening is cut 1.5” (3.75 cm) deep. I free-hand drew the rounded-v-neck. The shoulder is on the fold with two sides seams.

 Measuring For Tunic

In this section we will measure for our tunic. Please follow along with the video below and fill in your measurement sheet.

Download Measuring Sheet here.

 Materials and Supplies List

Fabric: The example I am sewing in this class is this organic cotton from Tatter. I am using the dark indigo but it comes in other colors too! I am using 1 yard for a short top. However you may want more depending on the style you design. Please design your tunic and find your measurements before you buy!

Any light to medium weight plain woven linen, cotton, silk, wool, tencel (or a blend of these) are good choices.

Thread: Any thread you have easily accessible but here are some options I like:

Linen (match weight to textile). For medium weight to lightweight use 80/2, 80/3; for lightweight use 100/2, 100/3. I like to use a contrasting thread to make the stitches visible. But it is up to you! You can buy contrasting or matching thread.

  • Great selection here!

  • Do not forget the beeswax for coating your thread here!

Silk - This is what I am using in the videos, it is a good weight for the lightweight cotton from Tatter.

  • Gutermann silk is easy to get here and is a really good quality.

Quilters Cotton

Needles: I’d recommend size 7,8,9 or 10 “sharps,” “appliqué,” or “embroidery” needles. The finer fabric the higher the number of the needle.

  • I love Bohin needles. Get them here!

Dressmakers shears: 8 inches.

  • My favorite shears are from William Whiteley and Co. in England who preserve the scissor making craft. Buy them here!

Small snips: Look for “embroidery” scissors.

  • My favorite small scissors are from William Whiteley and Co. in England who preserve the scissor making craft. Buy them here!

Pencil and tailors chalk

Measuring tape, ruler or seam gauge

Thimble (optional but encouraged): Should fit on the middle finger of your dominate hand. Not too tight but not too loose it falls off. Learn how to use one here!

  • Where to buy: Antique malls, eBay, etsy, Lacis has a fantastic stock here.

 Stitching Practice

This section has practice videos for each stitch used in this class. Before you begin to stitch please watch these close-captioned videos to practice your hand-sewing technique and then move into creating your seam samples. This section shows you how to sew ergonomically and how to use a thimble. And includes a running stitch, hemming, backstitching and a flat-felled seam technique— all stitches you may use for your tunic. It is so important to practice with a good foundation. My goal is to teach you a hand sewing technique that is sustainable so you can hand-sew clothing efficiently. To make the videos full-screen click the icon in the bottom right of the video.

Hand-Sewing Posture and Technique:

Threading A Needle/Knotting Your Thread

How To Hand-Sew With A Thimble

Running Stitch

Hemming/Felling

Backstitches

Flat-felled seam

 Cutting Out Tunic

In this section we will cut out our tunics. You will likely either cut out a tunic that is folded over the shoulder or folded on the side seam. In the video below I show you how to cut out a tunic with a fold over the shoulder. To cut out our tunics we are not using a paper pattern. Instead, we are taking our measurements and pin marking and/or chalking the shapes directly onto the fabric. Make sure you have designed your tunic and have filled out the measurement sheet before cutting out your tunic.

A note about seam allowance. You might notice that I did not include seam allowance. Since the garment will likely based on the width of the material you probably won’t need to factor in seam allowance. However, here is how to calculate it. If you are using a flat-felled seam or a Mantua-makers seam you will take the width of the final seam and double it for one seam. For example: if your flat-felled seam is finished at 1/4” (6mm) then the seam allowance is 1/2” (1.3cm).

 Stitching Arm Opening

In this section we will hem our arm openings. This is done on the outside of the tunic along the same raw edges your side seams will be stitched. In the cutting out section you should have marked the arm depth on the back and front of your tunic. You will be hemming a 1/8” (3mm) hem in-between these markings.

Right handed

Left handed

 Stitching Neck Opening

The neck opening will be hemmed with a small folded, flat hem at around 1/8” (3-4 mm) to 1/4” (6-7mm) wide. You will turn up the raw edges and baste them. Then you will fold it up again and fell the hem in place around 8 stitches per inch (2.5 cm). This is a bit tricker than it appears. the neck opening hem goes from being on grain to being on the bias this means it goes from fabric that is stable to being very stretchy.

Left handed

Right handed

 Stitching Side Seams

In this section we will sew our side seams. The video below shows you how I did my blue tunic side seams. I choose to do a flat-felled seam that is stitched first with a combination stitch of a running stitch and a backstitch. Then the seam is opened up and the fold is felled down. There are many different self finishing seams you can choose for your tunic such as:

  • Mantua-makers seam.

  • German felling (double felled seam).

  • Flat-felled seam: German felling (double felled seam).

  • Flat-felled seam: Combination running and backstitch.

  • Flat-felled seam: Backstitch.

  • Butted seam.

All of the above seaming techniques are in the Self-Finished Seams class. To review click here to go to the class.

Right handed

Left handed

 Hemming Your Tunic

In this section you will finish the bottom of your tunic. For the blue tunic I designed it so the selvedge was at the hem meaning it is already finished off. If you have a selvedge for your hem you might choose to leave it as is. If you have a fuzzy selvedge or a raw edge at the bottom you will want to hem it. The pink and white striped top is hemmed with a 1/8” (3mm) hem.

I would suggest hemming the bottom 1/8'“ (3 mm) to 1/4” (6-7mm).

Hemmed with a 1/8” (3mm) hem.

Closed selvedge used as the hem.

Once you have finished the bottom of your tunic you are done! Congratulations! I hope you loved sewing this piece and you love wearing it! Now you have made one you can make more!